
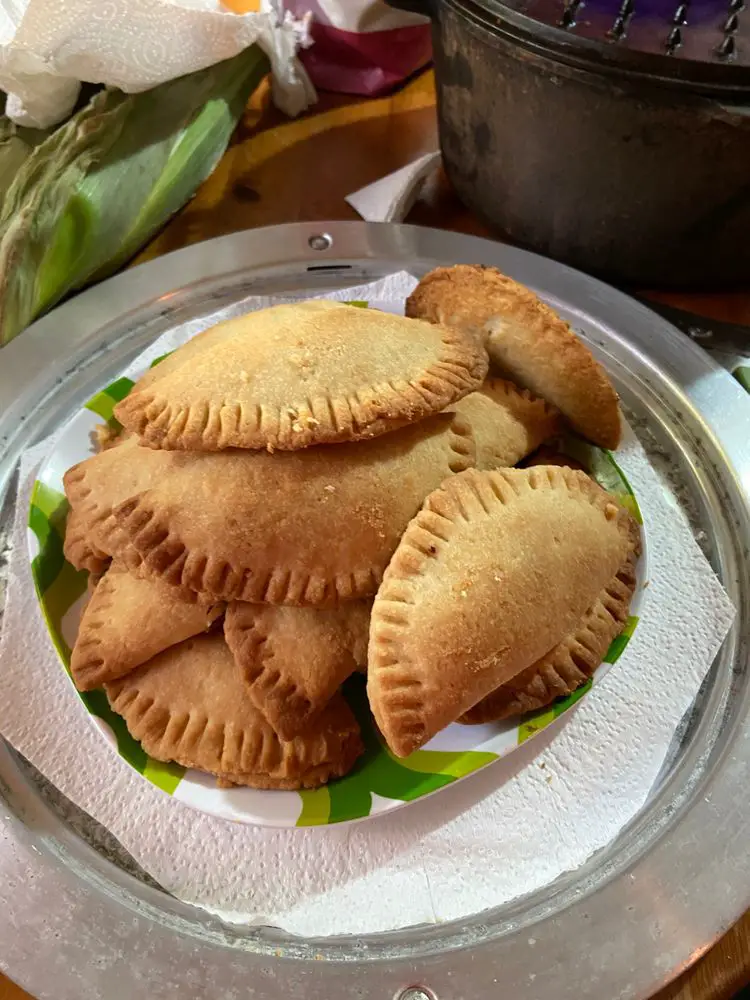
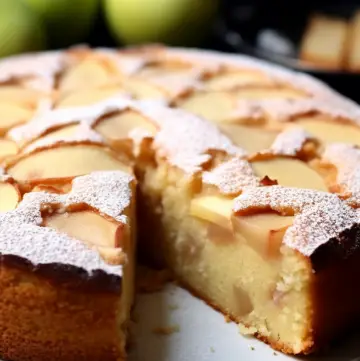
Apple Hand Pies – Indulge in the mouthwatering goodness of our Apple Hand Pies! These delightful treats are the perfect combination of flaky pie crust and luscious apple pie filling, making them an absolute must-try for any dessert lover. Whether you’re a seasoned baker or just starting out, these hand pies are sure to impress with their charming appearance and incredible taste. Get ready to experience the irresistible flavors of warm apples, sweet spices, and buttery pastry, all wrapped up in a convenient handheld package.
Picture this: It’s a crisp autumn afternoon, and the comforting aroma of freshly baked apple pie fills the air. As the scent wafts through the house, my husband’s eyes light up with anticipation. You see, our family has a deep love for apple desserts, and these Apple Hand Pies have become a beloved tradition in our home. From the very first bite, it was clear that these little pockets of joy were here to stay.
Ever since that day, I’ve cherished the moments spent together, rolling out the pie dough and preparing the apple filling. The laughter and chatter in the kitchen create an atmosphere of warmth and love. As the hand pies bake, the tantalizing scent intensifies, and our mouths water with anticipation. When they emerge from the oven, golden and tempting, we can hardly wait to savor their flaky crust and sweet, cinnamon-kissed apples. It’s a joyous occasion every time these Apple Hand Pies grace our table, making memories that will last a lifetime.
Why This Recipe Rocks: Apple Hand Pies that Steal Hearts
- Flaky and buttery pie crust: Our homemade pie crust is perfectly tender and boasts a heavenly buttery flavor. With just the right amount of flakiness, it adds a delectable texture to every bite.
- Luscious apple pie filling: We use juicy apples, brown sugar, and warm spices to create a filling that bursts with sweet, tangy, and cozy flavors. Each mouthful offers the taste of fall in every bite.
- Convenient and portable: These hand pies are the ideal grab-and-go treat. They’re perfect for picnics, lunchboxes, or simply enjoying as a delightful snack. No need for utensils—just hold one in your hand and take a blissful bite.
- Adorable and customizable: The cute shapes and decorative crust add a touch of whimsy to these hand pies. Let your creativity run wild as you shape the crust and create unique designs to make them even more irresistible.
Ingredients:
Pie Crust:
- 1 ½ cups all-purpose flour (200 g)
- 2 rounded tablespoons granulated sugar (31 g)
- ¼ rounded teaspoon kosher salt (2 g)
- 5 ounces unsalted butter, cold and cubed (141 g)
- 3 tablespoons cold water
- Extra flour for rolling
Apple Pie Filling:
- 2 apples, peeled and diced (263 g)
- 1 tablespoon lemon juice (15 g)
- ¼ cup brown sugar, lightly packed (46 g)
- ½ teaspoon apple pie spice
- A pinch of kosher salt
- 1 tablespoon unsalted butter (½ oz., 14 g)
- 1 tablespoon cornstarch (7 g)
- 1 tablespoon water
Egg Wash:
- 1 large egg
- 1 tablespoon milk
- 1 tablespoon turbinado sugar
- ¼ teaspoon apple pie spice (optional)
Directions:
Make the Apple Pie Filling:
In a mixing bowl, toss the diced apples, lemon juice, brown sugar, apple pie spice, and salt until well combined.
In a small saucepan over medium heat, melt the butter. Add the apple mixture to the saucepan and cook until the sugar dissolves and the apples start to soften slightly (about 5 minutes).
In a separate bowl, mix the cornstarch with cold water to create a slurry. Add the slurry to the saucepan and stir until the pie filling thickens (approximately 1 minute). Remove from heat and let it cool completely.
Make the Pie Dough:
In a food processor, combine the flour, sugar, and salt. Pulse several times to mix.
Add the cubed cold butter and pulse until the mixture resembles coarse crumbs, with the butter about the size of peas.
Add cold water, one tablespoon at a time, and pulse until the dough starts to come together.
Transfer the dough onto a lightly floured board, shape it into a disk, and wrap it in plastic. Allow it to rest in the refrigerator for an hour.
Assemble the Hand Pies:
Preheat the oven to 425°F.
Roll out the chilled pie dough on a lightly floured surface to a thickness of ⅛” to ¼”.
Use a 4.5″ cookie cutter to cut out circles from the dough. Gather the scraps and re-roll them to create more circles.
Place the dough circles on a parchment-lined baking sheet and refrigerate until ready to use.
Optional: Use a pie crust stamp to cut out decorative shapes from the remaining dough scraps and place them on a separate baking sheet lined with parchment paper.
Beat an egg with one tablespoon of milk to create an egg wash.
Take out one dough circle at a time, and roll the top half slightly to enlarge it.
Brush the bottom edge of the dough circle with egg wash, then add a heaping tablespoon of the cooled apple pie filling on top.
Fold the top half of the dough over the filling, pressing the edges together. Use a fork to seal the edges.
Repeat the process for the remaining dough circles.
Attach the decorative shapes to the hand pies by brushing the back with egg wash and adhering them to the top of each pie.
Place the assembled hand pies on a parchment-lined baking sheet and refrigerate or freeze for 15-30 minutes.
Just before baking, brush the entire surface of the hand pies, including the decorations, with egg wash.
Use the tip of a paring knife to create steam vents on the top of each hand pie.
Sprinkle the turbinado sugar (mixed with apple pie spice, if desired) generously over the tops.
Bake for 18-19 minutes, or until the hand pies turn golden brown.
Once baked, remove from the oven and allow them to cool on a wire rack.
Notes:
- Feel free to get creative with the decorative crust. Use a variety of shapes or even cut out initials to personalize your hand pies.
- If you prefer a more tart filling, you can substitute the brown sugar with granulated sugar or adjust the sugar quantity to your liking.
- These hand pies are best enjoyed fresh, but you can store any leftovers in an airtight container at room temperature for up to 2 days. To reheat, simply warm them in the oven for a few minutes.
Indulging in these Apple Hand Pies is like taking a bite of pure bliss. From the moment you lay eyes on their golden, flaky crust and breathe in the tantalizing aroma of warm apples and spices, you know you’re in for a treat. The combination of homemade pie crust and luscious apple pie filling creates a symphony of flavors that dance on your taste buds.
Whether you’re enjoying these hand pies as a special dessert, a delightful snack, or a portable treat for picnics or lunchboxes, they never fail to bring a smile to your face. The process of making them, from rolling out the dough to sealing in the sweet filling, becomes a joyous experience to be shared with loved ones.
So, gather your family and embark on a culinary adventure with these Apple Hand Pies. Let the aroma fill your home and the taste transport you to a world of delectable delight. These little pockets of happiness are not just a dessert but a way to create lasting memories and share moments of pure joy. Give them a try, and get ready to fall in love with these irresistible treats.
FAQ
Can I use store-bought pie crust instead?
Absolutely! While homemade pie crust adds a special touch, store-bought crust can be used as a convenient alternative.
Can I make the hand pies in advance?
Yes, you can assemble the hand pies ahead of time and refrigerate or freeze them until ready to bake. Just remember to brush them with the egg wash and sprinkle the sugar right before baking.
Can I use different fruits for the filling?
Definitely! While apple filling is classic, you can experiment with other fruits like peaches, berries, or even a combination of fruits for a unique twist.
Can I freeze the baked hand pies?
Absolutely! Once the hand pies have cooled completely, you can place them in an airtight container or freezer bag and freeze for up to 2 months. When ready to enjoy, reheat them in a preheated oven until warmed through.

Apple Hand Pies
Ingredients
Pie Crust:
- 1 ½ cups all-purpose flour 200 g
- 2 rounded tablespoons granulated sugar 31 g
- ¼ rounded teaspoon kosher salt 2 g
- 5 ounces unsalted butter cold and cubed (141 g)
- 3 tablespoons cold water
- Extra flour for rolling
Apple Pie Filling:
- 2 apples peeled and diced (263 g)
- 1 tablespoon lemon juice 15 g
- ¼ cup brown sugar lightly packed (46 g)
- ½ teaspoon apple pie spice
- A pinch of kosher salt
- 1 tablespoon unsalted butter ½ oz., 14 g
- 1 tablespoon cornstarch 7 g
- 1 tablespoon water
Egg Wash:
- 1 large egg
- 1 tablespoon milk
- 1 tablespoon turbinado sugar
- ¼ teaspoon apple pie spice optional
Instructions
Make the Apple Pie Filling:
- In a mixing bowl, toss the diced apples, lemon juice, brown sugar, apple pie spice, and salt until well combined.
- In a small saucepan over medium heat, melt the butter. Add the apple mixture to the saucepan and cook until the sugar dissolves and the apples start to soften slightly (about 5 minutes).
- In a separate bowl, mix the cornstarch with cold water to create a slurry. Add the slurry to the saucepan and stir until the pie filling thickens (approximately 1 minute). Remove from heat and let it cool completely.
Make the Pie Dough:
- In a food processor, combine the flour, sugar, and salt. Pulse several times to mix.
- Add the cubed cold butter and pulse until the mixture resembles coarse crumbs, with the butter about the size of peas.
- Add cold water, one tablespoon at a time, and pulse until the dough starts to come together.
- Transfer the dough onto a lightly floured board, shape it into a disk, and wrap it in plastic. Allow it to rest in the refrigerator for an hour.
Assemble the Hand Pies:
- Preheat the oven to 425°F.
- Roll out the chilled pie dough on a lightly floured surface to a thickness of ⅛" to ¼".
- Use a 4.5" cookie cutter to cut out circles from the dough. Gather the scraps and re-roll them to create more circles.
- Place the dough circles on a parchment-lined baking sheet and refrigerate until ready to use.
- Optional: Use a pie crust stamp to cut out decorative shapes from the remaining dough scraps and place them on a separate baking sheet lined with parchment paper.
- Beat an egg with one tablespoon of milk to create an egg wash.
- Take out one dough circle at a time, and roll the top half slightly to enlarge it.
- Brush the bottom edge of the dough circle with egg wash, then add a heaping tablespoon of the cooled apple pie filling on top.
- Fold the top half of the dough over the filling, pressing the edges together. Use a fork to seal the edges.
- Repeat the process for the remaining dough circles.
- Attach the decorative shapes to the hand pies by brushing the back with egg wash and adhering them to the top of each pie.
- Place the assembled hand pies on a parchment-lined baking sheet and refrigerate or freeze for 15-30 minutes.
- Just before baking, brush the entire surface of the hand pies, including the decorations, with egg wash.
- Use the tip of a paring knife to create steam vents on the top of each hand pie.
- Sprinkle the turbinado sugar (mixed with apple pie spice, if desired) generously over the tops.
- Bake for 18-19 minutes, or until the hand pies turn golden brown.
- Once baked, remove from the oven and allow them to cool on a wire rack.


Leave a Reply